Setting up Windows subsytem for LINUX IN WINDOWS 10 and INSTALL NCAR COMMAND LANGUAGE (NCL)
- Pravash Tiwari

- Jul 12, 2019
- 3 min read
The National Centre for atmospheric research (NCAR) developed a free interpreted language specifically designed for scientific data processing and visualization.
Salient Features:
· NCL has robust file input and Output
· Can read and write wide variety of data (netCDF, HDF, binary and ASCII)
· The power and utility of the language are evident in three main components: file input and output, data analysis and visualization
(Source and details: https://www.ncl.ucar.edu/overview.shtml)
Tutorial:
Installation media: Windows subsystem for LINUX (Ubuntu 16.04 LTS and 18.04 LTS) in Windows 10

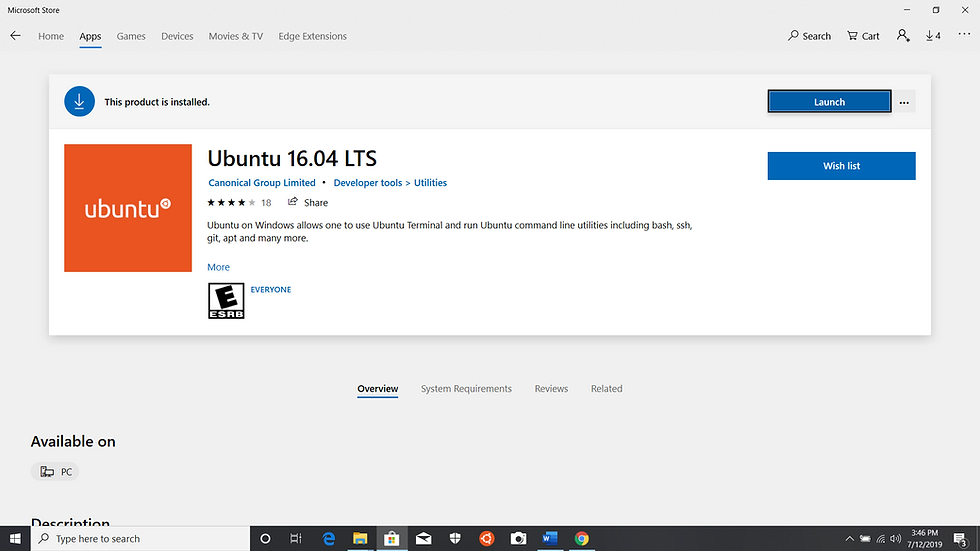
1. One can install the Ubuntu 16.04 and 18.04 LTS from Microsoft store

2. On directly opening ubuntu after installing it might return the error similar to “Windows optional component is not enabled…...” for that we simply have to follow through a minor step enabling this feature.
3. Once the feature is enabled the Error will get resolved and we can use Linux subsystem in our Windows 10. We quickly run the updates with command
sudo apt-get update
NOW OUR LINUX SYSTEM IS READY and before proceeding to download and install NCL, required libraries and all prerequisite are downloaded first
STEP 1. From the Linux bash window that you opened earlier, type the following commands to install the required packages. You can put multiple packages on one line:
sudo apt-get install csh libfontconfig gfortran libgfortran3
sudo apt-get install libxrender-dev libx11-dev libxrender1
sudo apt-get install libssh2-1 libgomp1
sudo apt-get install firefox imagemagick
STEP 2. A X-server is required to use the X11 windows option in NCL graphics
Download and install Xming package from the link https://sourceforge.net/projects/xming/ .

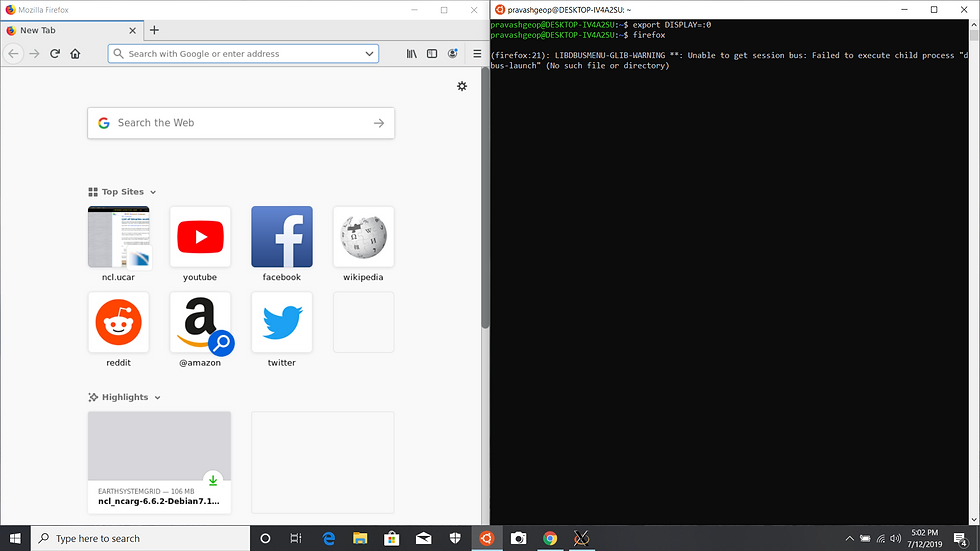
Now to test windows bash can run graphical LINUX application type following command in your UBUNTU prompt
export DISPLAY=:0 firefox
Using X server like Xming on Windows PC, the graphical application should run. It may not run as speedily—applications can’t use direct rendering to run on your hardware directly.
(Source and details: https://www.pcworld.com/article/3055403/windows-10s-bash-shell-can-run-graphical-linux-applications-with-this-trick.html )
STEP 3. Now we are ready to download NCL:
Open a browser window from the Linux shell (using the above instructions from PC World).
Go to the Climate Data Gateway web site.
Navigate your way to the NCL Version 6.6.0 OPeNDAP enabled or non OPeNDAP enabled page.
Download the binary for the 64-bit version of NCL compiled under Debian 7.11:
ncl_ncarg-6.6.2-Debian7.11_64bit_gnu472.tar.gz
link to download ncl-6.6.2 :  https://www.ncl.ucar.edu/Download/list_of_binaries.shtml
Install NCL
From the Linux bash shell window that you started earlier, type the following commands:
mkdir /usr/local/ncl-6.6.2tar -zxf ~/Downloads/ncl_ncarg-6.6.2-Debian7.11_64bit_gnu472.tar.gz -C /usr/local/ncl-6.6.2
You can remove the ncl_ncarg-6.6.2-Debian7.11_64bit_gnu472.tar.gz file once the above commands are done.
There might be an issue on simply typing mkdir which ma return permission denied to overpass this use
sudo mkdir /usr/local/ncl-6.6.2
sudo  tar -zxf ~/Downloads/ncl_ncarg-6.6.2-Debian7.11_64bit_gnu472.tar.gz -C /usr/local/ncl-6.6.2
To permanently avoid this permission issue you can type following command on the LINUX bash shell window
sudo chmod a+rwx /usr/local
STEP 4. Setting up environment to run NCL
With unix editor like 'vim' edit the profile or bash rc
in the linux bash shell window type
vim ~/.profile
and press i (insert: enabling you to edit the script)
below the very last line (below fi) add following environment paths
export NCARG_ROOT=/usr/local/ncl-6.6.2
export PATH=$NCARG_ROOT/bin:$PATH
export DISPLAY=:0
After editing press escape followed by :wq to save the script
same lines are added in case of vim ~/.bashrc
Again press escape followed by :wq to save the script


So your profile and bashrc will have these lines in the end.
STEP 5. After saving the script type source .bashrc to enable the changes made in bashrc
TEST NCL
Now to test our installation was succesful type :
ncl -V in the LINUX bash shell window open earlier
This should return you the version of NCL installed which is 6.6.2
BUT
One might end up encountering the error which says librtmp.so.0 => not found
To bypass this error we simply type the following code
sudo ln -s /usr/lib/x86_64-linux-gnu/librtmp.so.1 /usr/lib/x86_64-linux-gnu/librtmp.so.0This works with UBUNTU X86-64

Then again on typing ncl -V we get in return the version of ncl which ensures our NCL is correctly installed in our system
ENJOY AND EXPLORE NCL


Comments